This is the first article in the DIY Soap Making Series
DIY Making Your Own Bar Soap, Part 2 Customization
Making Homemade Bar Soap, PART 1 Mixing
A few months ago I started making my own laundry detergent after almost fainting over the prices in the stores (even after coupons!). I’ve been so happy with the outcome and I haven’t had to make anymore yet. So, I decided to push my luck and give bar soap making a go. My soap is still curing but it looks hopeful so there will be an update later! Maybe some of these tips can help you decide if you want to try making your own bar soap at home.
Making your own soap has some definite advantages. We can make our own soap cheaper than we can buy it. Making it ourselves also gives us complete control over the ingredients, so we can create a soap that’s perfect for our skin type in scents that we love.
After your first batch you can increase your amounts to do large batches and squeeze out even more savings. I don’t recommend doing this with your first batch for two reasons:
1) What if you’re not real happy with the ingredients that you choose? Maybe you want to try vanilla beans instead of oatmeal or jojoba oils instead of lard. You won’t have tons of soap that you don’t care for to use up. Think of this as your trial and error batch!
2) It’s already going to take the longest time with your first batch-it will get easier and easier every time you make it. It’s easier to control a smaller batch. You can start on your second batch whenever you want because the soaps have to cure. Get the basics down first!
Safety First!!
Safety can’t be expressed enough when it comes to making soap because you will be working with lye. This isn’t something you should involve your children in. Actually you may want to do this while you’re the only one home to avoid any accidents or disruptions. The soap will need your attention for up to 3 hours on your first DIY batch.
- WEAR GOGGLE!! You will be working with Lye, your eyes could get splashed.
- WEAR GLOVES, same reason as above.
- Wear old clothes.
If there are two things I would like you to remember from this articles it’s to please wear safety goggles and when mixing the lye and water, add the lye to the water. According to Majestic Mountain, (great website for extra information on soap making) It’s important to add the lye to the water and not the water to the lye. It could cause a volcano type reaction. So please add the lye to the water. You will be fine if you remember these two things.
Making soap is much easier than you might think. I don’t want you to think this is a tedious task because it’s not, it’s fun and easy. Safety first always!
Here’s the supplies you will need:
- molds that you will pour the soap into to let it set, you can use a cardboard box lined with plastic wrap, a drawer organizer, or even a drawer. Depending on how much you are making you can use the cookie tray that comes in the boxes of cookies we love to eat. Line all with plastic wrap
- plastic wrap
- extra towels for insulating the molds
- soap spoon or a spoon…no wooden spoons
- scale (even if you have to borrow the neighbors, please weigh the ingredients, it will make a huge impact on the soaps outcome)
- large pot, don’t use aluminum
- goggles
- gloves
- medium to large glass bowl, you will be able to choose which bowl to use by the end of this article.
Optional supplies:
- thermometer, stainless steel
- microwavable plastic pot
- immersion blender (ONLY, no other types of blenders should be used due to the air they will pull in)
Ingredients
This is where the fun starts.
- lye (about 2.2 – 2.7 oz)
- water (6 fluid oz per lb of fat, or about 30% of the total recipe)
- oils, fats (about 16 oz.)(can be mixed up with different kinds. ie. 5 oz jojoba oil, 5 oz shea butter, 6 oz Crisco)
This lye calculator is a must for making your homemade soap. Enter into it what you want in your recipe and you will get a printout telling you how much of water and lye you will need.
You will be doing yourself a favor to read the “How to Enter Your Own Recipe” first.
Optional Ingredients:
- fragrances
- oats, ground beans…ie..vanilla, flax
- milk, in place of water
Instructions
Once you have your safety goggles and gloves on, step outside with the water, lye, spoon and glass bowl. Stand downwind. Put the water in the bowl and slowly add the lye to the water (only slow enough that it doesn’t splash back on you). Stir the water and lye together until the lye dissolves in the water. The lye will cause a heat reaction so you will want to set it aside to cool. Allow it to cool to 100-125 degrees.
Whether you are using one, two or three oils, mix them together and warm them slowly on the stove. You can also put them all in a plastic microwavable bowl and melt them that way. When the ingredients are mixed well and melted allow to cool to 100-125 degrees.
Combine the two mixtures in a large pot on the stove. Start stirring. Stir until trace. Trace is when the mixture no longer separates into water on the bottom and oil on the top. There is a slight thickening, slight color change and the mixture appears smooth in consistency. This can take from 5 minutes to an hour or more. This is where an immersion blender will come in handy. It will accelerate trace in the mixture. You can stir for 5, leave for 15, stir for 5 etc. It depends on how things are coming along for you.
It’s time to customize your soap!
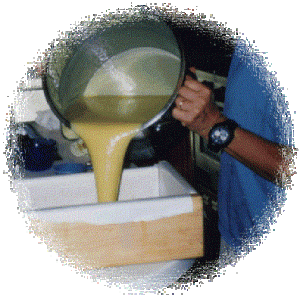
Once tracing occurs and you have your soap customized pour it into your plastic wrap lined molds. Without getting the soap on the towels, cover the molds with the towels and pack the towels around your molds to insulate them. Leave the soap to sit for 18-24 hours. Then remove the soap from the molds and cut into bars.
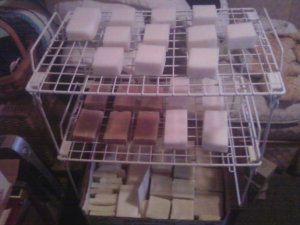
After you have cut the soap it will have to cure. Curing is basically waiting for the water to leave the soap. It’s called saponification. If you don’t cure the soap long enough it will be too soft and it won’t last very long. Depending on how your soap mixture turns out you will cure the soap from 3-6 weeks.
Making your own homemade bar soap is easy once you have the hang of it. Don’t let your first time deter you from giving it another go. Practice makes perfect! Before you know it your friends and family will be asking for you to make them specialized soaps. Coming up with the perfect concoction for your skin is rewarding, and sweetly scented homemade soaps make wonderful gifts for any occasion. You can also recap your initial expenses by selling your homemade soap or whipping up a few gift baskets and selling them.
Tips
- Cut your soap into blocks as soon as you can. The longer you wait, the harder the soap gets making it almost impossible to cut,
- Look in your phone book under chemicals lye. Ask for lye which may be better known as sodium hydroxide, or caustic soda.
- Ask for technical grade not lab grade. Lab grade is often 3 to 10 times the price.
- Weigh everything 2 or 3 times. Getting the weight right has a huge impact on the soaps outcome.
- Play around with different scents and exfoliates. Keep good notes.
- Use the lye calculator when putting your recipe together. There’s lots involved in getting the correct amounts of products together. Each fat affects your recipe differently. The amounts I have listed above are from the recipe I entered into the lye calculator.
- Consider getting a group of family and friends together and sharing in the cost. You will be able to try different recipes without spending any extra money.
Photo Credit


Discussion
Trackbacks/Pingbacks
Pingback: DIY Make Your Own Bar Soap, Part 2 Customization « Sharing it Forward - May 1, 2012
Pingback: DIY Making Your Own Bar Soap, Part 2 Customization « Sharing it Forward - May 1, 2012